United States
US
United States
US


How To Design Your Ideal Online Teaching Setup
Join a global community of over 200,000 TEFL teachers working throughout the world! Enrol me!
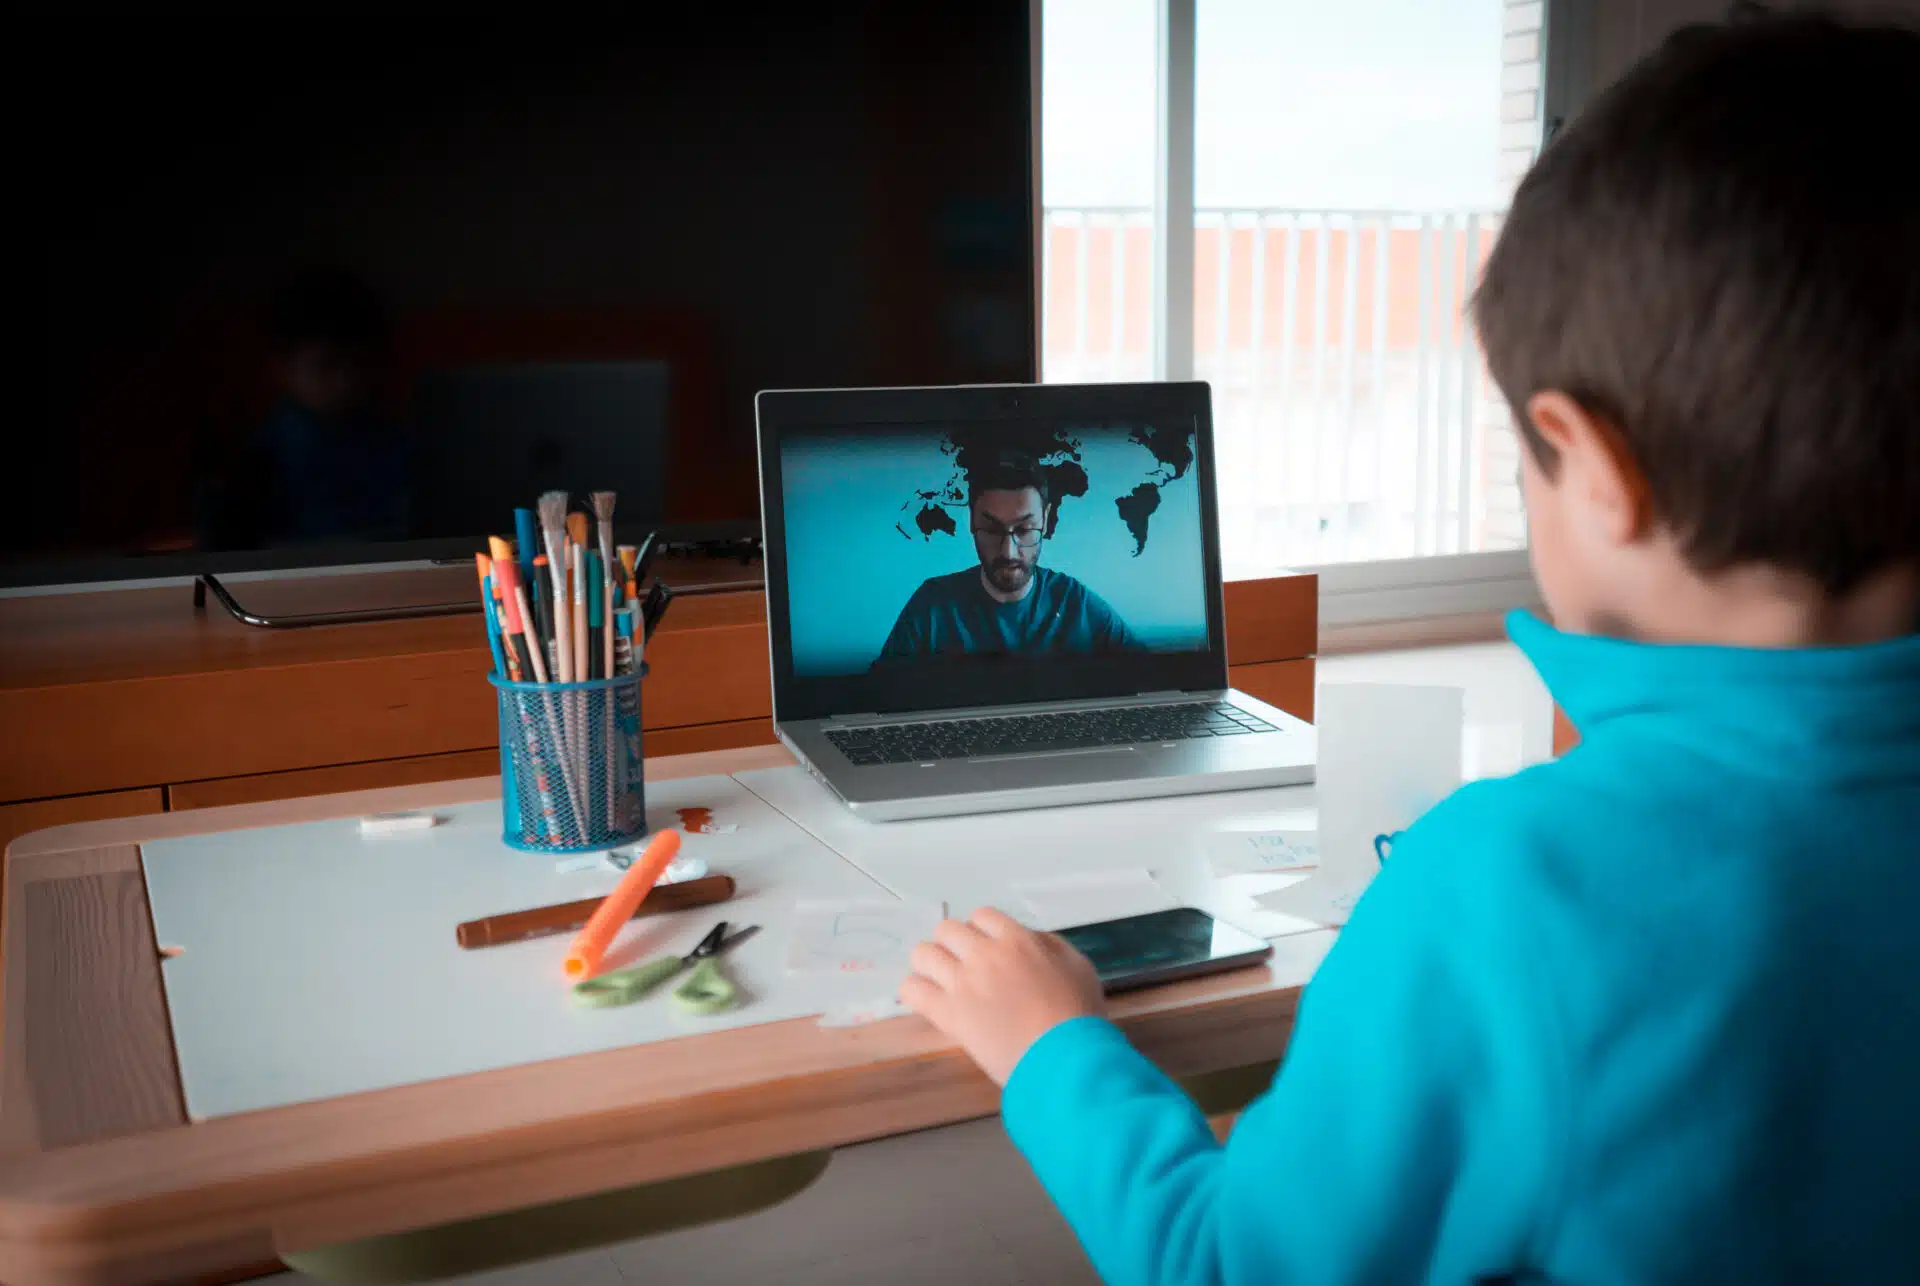
When it comes to teaching English online, a cluttered desk and poor lighting send all the wrong signals — like you’re unprepared or not taking your lessons seriously. That’s why we asked TTA alumna Vanessa to share her tried-and-tested tips for creating the ultimate online teaching setup that’s comfy, practical, and totally you.

Why does your online teaching space matter?
There are several reasons why your online English teaching space is so important.
This is your job, not a casual hangout. You want to appear professional and create a sense of trust and security for your students. If you have a cluttered kitchen counter or laundry pile in the background, you’re not presenting yourself professionally — and students may not feel confident in your ability to guide their learning journey.
A tidy space with all your online teaching tools within reach is essential. Imagine wasting five minutes searching for your lesson notes! Not only does it cut into valuable lesson time, but it also looks unprofessional.
Good lighting is also crucial. Think about how it feels to chat with a stranger online in a dark room — it’s not exactly confidence-inspiring. A well-lit, organised, and distraction-free space helps you appear professional, prepared, and trustworthy.
Read more: Tips For Setting Up An Online Classroom
What are the essentials for an online teaching setup?
You can start simple. It’s not necessary to have a fully equipped online classroom from the beginning. Start with the basics and build from there.
I know people who began by sitting on the floor with their laptop on a box and a bedside lamp beside them!
You can gradually build your setup by adding small things that make the biggest difference for you. What matters most is getting up and running.
So what are the essentials?
You need:
- A clear, uncluttered background
I prefer a plain wall, while you can add a few relevant teaching posters, it’s important that it’s not too distracting or busy.
- Sufficient lighting
You can start simple with a bedside lamp placed in a creative spot to ensure the best lighting.
- A table and chair
When you start to flesh out your teaching space, you can start looking into things like a laptop stand or an ergonomic or gaming chair — these are very comfortable and built for long sitting sessions.
Read more: 5 Essentials For Teaching English Online
What tech tools improve online English teaching?
Certain tools make a huge difference to your online teaching experience:
A second screen was a game-changer for me. You can have the lesson open on one screen and your session notes on the other.
A UPS or inverter is invaluable, especially since power outages are beyond our control, and these can help maintain a stable connection.
The term UPS stands for Uninterrupted Power Supply. An inverter is a device that keeps other devices running by converting battery power into usable electricity.
A good headset with a quality microphone is essential, as sound clarity is important for both you and your students.
Proper lighting ensures you are fully visible.
How can teachers look professional on camera?
Creating a professional-looking space on camera can be as simple as choosing a clear background.
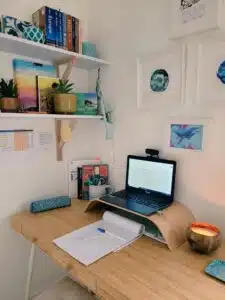
Avoid sitting with your back facing an open room. I understand that depending on your room layout, this may not always be possible, but whatever is visible in your background should be clean, tidy, and uncluttered. I prefer a plain white or cream wall — no distractions, no people walking behind you, and no risk of mess.
Once you have extra money to invest in your space, you might consider mounting a small whiteboard behind your desk or adding posters related to your teaching content. But this isn’t necessary, as many people prefer to keep their background distraction-free.
Read more: 5 Must-have Classroom Props For Teaching English Online
Personalising your online teaching space
When you’re planning to sit for hours on end, it’s important to ensure that your space is comfortable.
Comfort = better lessons
Your workspace should include only the items you need for your lessons. For example, your notebook (if you prefer handwritten notes), a glass of water, a non-messy snack, and a few stationery items.
You can purchase accessories that help organise your desk more efficiently, and they really do make a difference.
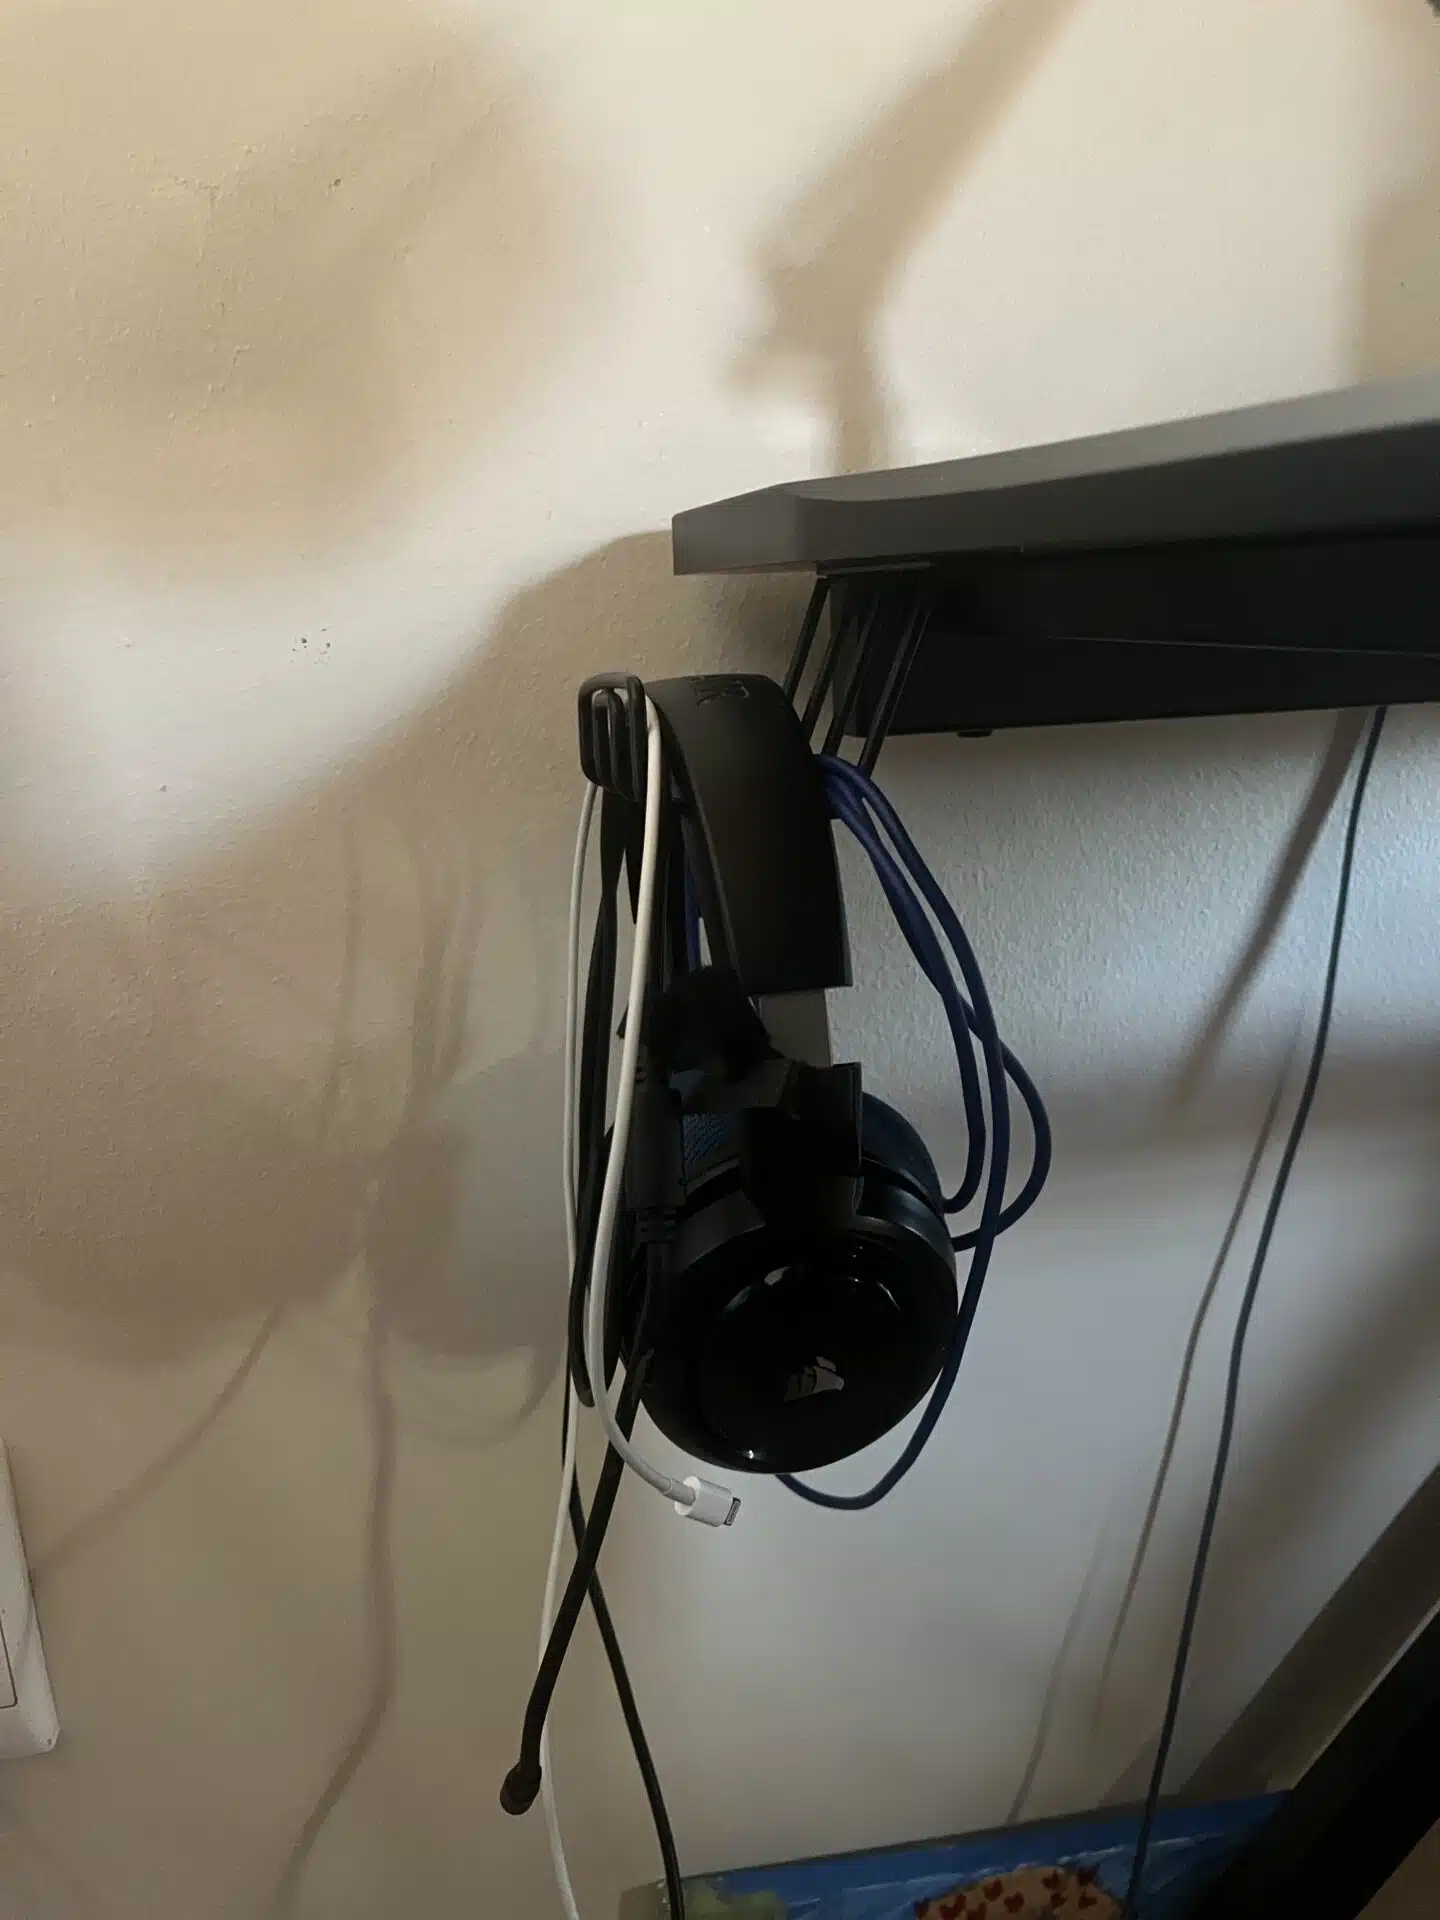
I have a cup holder on the right-hand side of my desk and a hook on the left for hanging my headset and cable: no tangled cords to trip over or clutter the desk, and no risk of knocking over my coffee while I work!
Pro tip: Keep liquids in spill-proof containers to avoid desk disasters.
I use a laptop stand that serves multiple purposes. It includes a small fan powered by a USB cable to keep my laptop cool, and it raises the screen to a more comfortable level for typing and viewing.
My second screen is mounted on an adjustable arm, which keeps the base off the table and allows me to easily change its angle and distance.
There are so many tools available to improve your teaching space. Have a look online; there’s almost always a clever solution out there.
Teaching from small or shared spaces
Not everyone has a dedicated home office. If you’re teaching English online from a small space or in a co-working environment, you need to make a plan.
Have a teaching go-bag.
That’s a great tip! For those wondering what a go-bag is, in the online teaching world, it’s your grab-and-go kit packed with everything you need to set up and teach in seconds.
This bag should be used exclusively for your teaching items to ensure that nothing gets lost or forgotten. Everything you need should be packed and ready to carry to and from your workspace with ease.
Pack light. It might be a good idea to store your notes digitally. That way, you’ll only need to carry your laptop, UPS or inverter, headset, and any necessary cables.
Organising your online teaching materials
Staying organised is crucial for online English teachers.
Many different online tools help with organisation. Some people prefer saving their presentations and documents directly on their device, while others prefer to save them on their Google Drive.
Saving your teaching materials on Google Drive has several benefits, as Vanessa explains.
- If you save it on your Google Drive, you can easily access your content from ANY device, ensuring that you are still able to teach, even if you don’t have your device with you.
- I use Google Drive to organise my presentations. Each student has their own folder.
- It’s important to save your content logically for easy access. I organise lessons by their scheduled date to quickly find relevant documents.
I love using Arc. It’s a browser with a refreshingly unique approach. Instead of the traditional horizontal tabs, it uses a vertical sidebar for managing tabs and features customisable workspaces called Spaces. This makes it easy to separate your different profiles and tasks.
For example, you can create a personal Space for home use, and separate Spaces for the different companies you teach for. Each Space can include all the teaching tools you need, like Kahoot, Edpuzzle, Google Forms and whatever LMS your company uses — whether that’s Google Classroom, Moodle, or others. Everything stays neatly organised, and you can easily switch between accounts depending on what you’re working on.
There are some excellent note-taking apps available to help you stay organised. I use Bear: Markdown Notes. Unfortunately, it’s only available on Apple devices, but there are many great alternatives for Android as well.
While I prefer my note-taking app, some prefer having their notes in the same place as their students’ presentations. You can sort all the information by using Folders in Google Drive.
Mistakes to avoid in your online teaching setup
A cluttered space: Your environment should be clutter-free, and your tools should be easily accessible to create an effective teaching setup. When moving quickly from one lesson to the next, you want your space to support smooth transitions. It helps no one if you’re fumbling around and forgetting important things between sessions.
Ignoring ergonomics: You’ll be sitting for long periods, not just during lessons but also while preparing content. It’s important to take care of your body. Make sure your chair provides proper back support, and position your laptop at an angle that prevents neck strain.
Not testing your set-up: Everyone’s ideal set-up will look different — it should cater to your specific needs. Try it out in advance and make any necessary adjustments before your first day of teaching.
Any tips for creating an effective teaching space with limited room or resources?
Less is more.
A clear background is better than a messy one.
Many tools can enhance your experience, but they’re not essential in the beginning. Start with the basics — your laptop, a good headset, sufficient lighting, and a stable internet connection — and gradually improve your set-up as needed.
One thing that made a big difference for me in terms of space was using an arm mount for my second screen. It keeps the screen off my desk, freeing up space, allowing for more comfortable movement.
What does a typical day in your workspace look like?
I wake up, make myself a cup of coffee, eat breakfast, and get ready for a day of work!
I fill up my water bottle and grab a healthy snack like nuts. Then I sit at my desk and jump straight in! I open my Google Calendar and my note-taking app, Bear.
It’s important to be prepared for the day ahead, so I ask myself:
- What lessons do I have scheduled?
- Are my notes ready for those lessons?
- What areas of concern do the students I’m seeing today have?
- Is my laptop plugged in?
- Is my light working?
- Is my internet speed as it should be?
Once I’ve answered all these questions, I prepare for my first lesson and make sure all the teaching tools I plan to use during the lesson are working.
About 10 minutes before the lesson, I take a quick bathroom break, ensure I look presentable, refill my water bottle, and join the online classroom. I then test my sound, camera, and headset microphone.
After each lesson, I update my notes and prepare for the next one. I refill my water as needed and take bathroom breaks between sessions.
At lunchtime, I eat a simple meal in a separate space to keep my workstation clean, then jump right back into work!
Has your working space changed since you’ve been teaching?
My space has definitely become clearer and simpler over time, but some things have never changed, like my background, which is still clear.
While many teachers like having relevant and interesting items displayed behind them, I prefer a non-distracting, minimalist background. I like my desk to be as empty as possible: an open space equals an open mind.
Now I prefer taking digital notes because they stay neat, up-to-date and organised.
What is one thing that you absolutely couldn’t live without?
My laptop stand! It prevents any strain on my neck or wrists by keeping my laptop at the perfect angle. The fan feature is an amazing bonus, especially since most online classrooms and tools tend to warm up your device quite a bit.
Vanessa’s tips prove that creating an effective online teaching space doesn’t mean breaking the bank or having everything perfect from day one. Start small and let your space evolve alongside your teaching journey. Don’t be scared to inject your personality into your teaching space. Your setup should support you in feeling comfortable and inspire you to teach at your best.
If you’re unsure whether you’re cut out for online teaching, check out what skills you need to be an effective online teacher. If you’re looking for more formal training in teaching online, don’t forget about our Top-Up Course: Teaching English Online and 1:1
Author Bio

Accreditation & Quality Assurance
The TEFL Academy was the world’s first TEFL course provider to receive official recognition from government regulated awarding bodies in both the USA and UK. This means when you graduate you’ll hold a globally recognised Level 3 (120hr) Certificate or Level 5 (168hr) Diploma, meaning you can find work anywhere and apply for jobs immediately.